Add cinematic drama to a photo
Skill Level: Intermediate
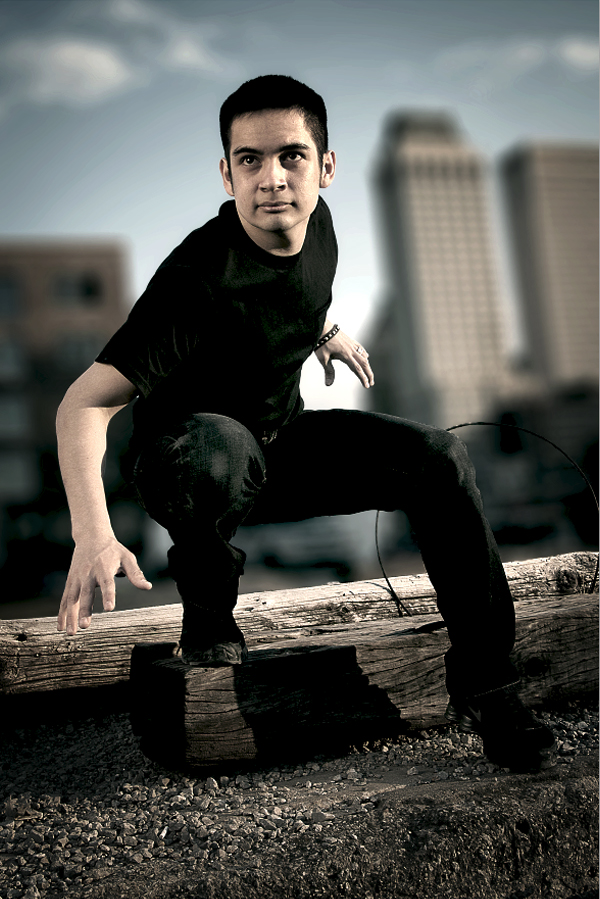
Learn how to add cinematic drama to your photos by simulating lens blur, and adding photo filters, and sharpening detail
The Final Outcome

The stock photo I’ve used for this tutorial was provided by deviantART member Sunshine114, and can be downloaded for free here.

Take the Quick Selection Tool and draw over the sky and buildings in the background.
You can use the ‘[' and ']‘ keys to change the size of the brush, and hold down the alt key to subtract from the selection.
You can use the ‘[' and ']‘ keys to change the size of the brush, and hold down the alt key to subtract from the selection.

When you’ve made the best selection you can, go to Select > Refine Edge.
Use the Refine Radius Tool to draw over the edge of the hair, improving the edge.
When you’re finished make sure the output is set to New Layer with Layer Mask, and click OK.
Use the Refine Radius Tool to draw over the edge of the hair, improving the edge.
When you’re finished make sure the output is set to New Layer with Layer Mask, and click OK.

With your new layer selected, go to Filter > Blur > Lens Blur.
Use the same settings as I have in the image above, making sure the Source for the Depth Map is set to Layer Mask.
Click OK, and then wait for the Lens Blur filter to render.
Use the same settings as I have in the image above, making sure the Source for the Depth Map is set to Layer Mask.
Click OK, and then wait for the Lens Blur filter to render.

When it’s done, duplicate the layer, and select it’s layer mask.
Go to Image > Adjustments > Invert.
Go to Image > Adjustments > Invert.

Call the layer ‘high pass’, and with the layer thumbnail selected, go to Filter > Other > High Pass.
Set the Radius to 2.5px.
Set the Radius to 2.5px.

Set the layer’s blending mode to Overlay, then duplicate
the layer a couple of times to strengthen the effect.

Click on the Adjustment Layer button at the bottom of the layers panel, and choose Hue/Saturation.
Set the Saturation to -75.

Next add a Color adjustment layer using the colour #00fff6.
Take the layer opacity down to 5%, and set it’s blending mode to Lighten.

Add a Photo Filter layer using the colour #ec8a00 with the Density set to 10%.

Add an Exposure adjustment layer and subtly tweak the sliders to strengthen the shadows and highlights as I have n the image above.

Finally add a gradient adjustment layer using a black to transparent Radial gradient with the Scale set to 150%.
Set the layer’s blending mode to Soft Light.
Set the layer’s blending mode to Soft Light.

Duplicate the layer, and set the duplicates opacity to 50%.
The Final Outcome
Please leave a comment and use the share buttons below.
Thankx for reading :)
N's Desiner
Comments
Post a Comment